Add/Configure Site Settings
1. Log in to Everyminute with your Administrator credentials.
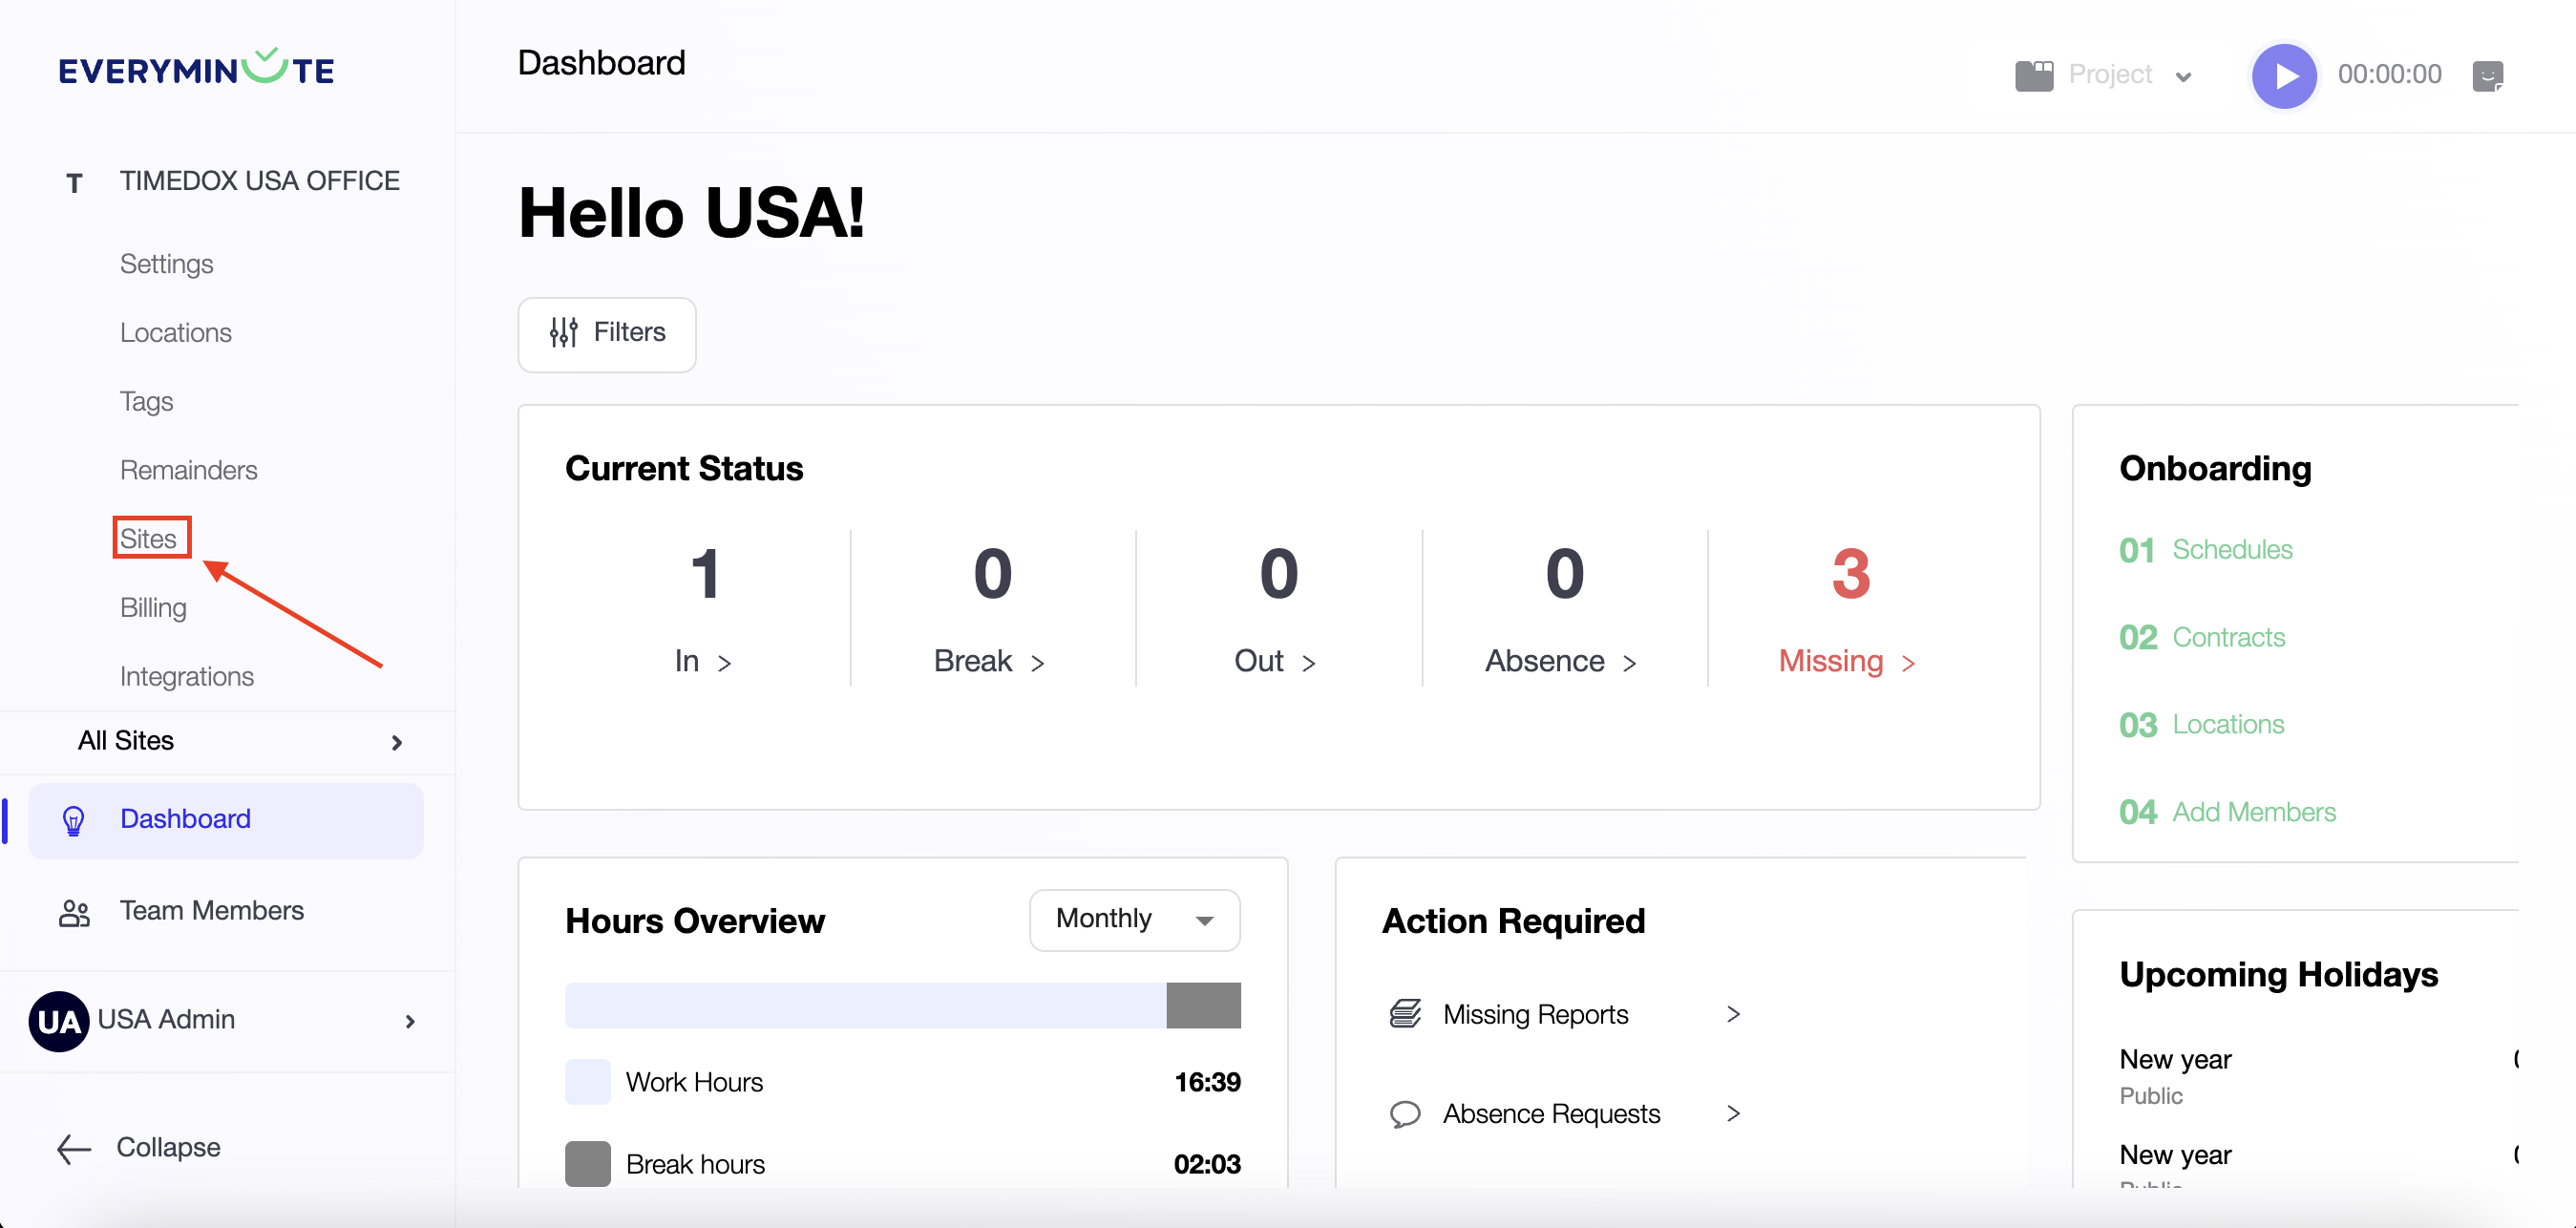
2. On your Dashboard, click your company's name in the left panel (above 'Team Members').
3. Select 'Sites.'

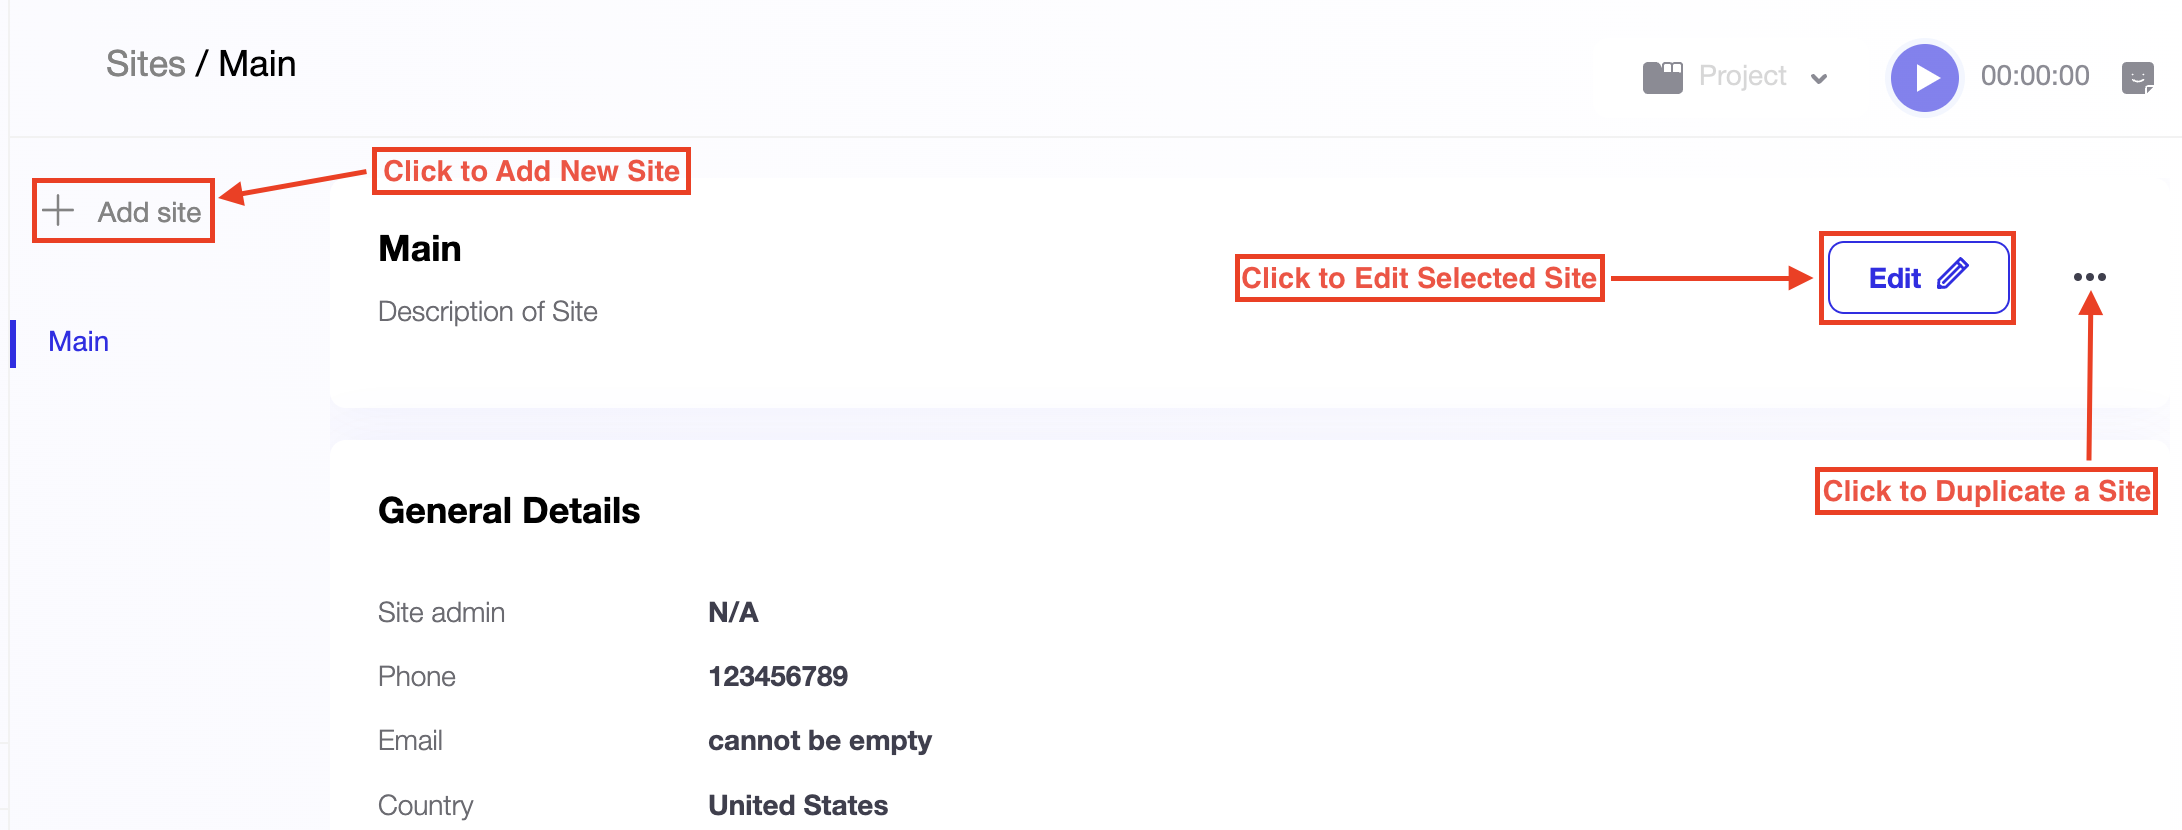
4. You can now either 'Add Site' or choose an existing site to view/edit its configuration.

5. Fill each section with the necessary information.
6. Click 'Save'
5. Fill each section with the necessary information.
6. Click 'Save'

Pro Tip: If you have Sites that are similar in configuration, you can duplicate Sites by clicking the three dots next to the 'Edit' button.
Below are descriptions of the fields to be filled out:
General Details: This section allows you to manage essential site information, including the Site Admin, who oversees the site's operations. You can provide contact information such as Phone and Email, and associate the site with a specific Country, as well as additional location details like State/Region, City, and Street.
Regional Settings: These preferences allow you to customize time and date settings for your site. You can choose the Hour Format (e.g., 12-hour clock), set the Date Format (e.g., MM/DD/YYYY), and select the appropriate Time Zone (e.g., Eastern Time, UTC-05:00). Additionally, you can enable automatic adjustments for Daylight Saving Time.
Site Preferences: These settings help configure the structure of your site’s schedule and payroll system. You can set the First Day of the Work Week and define when the Day Starts (e.g., 3:00 AM). The Pay Period can be configured (e.g., Bi-Weekly), with an initial start date for the pay period. You can choose whether to Split Timesheets at Midnight and apply Breaks Rounding (e.g., 15 minutes).
Additional options include requiring Approval for Timesheet Editing and allowing Members to Report in Other Sites.
Advanced Settings: These allow you to define limits for work hours and breaks. You can set the Max Break Duration, establish the Max Shift Length, and specify the Max Extra Hours that employees can work.
Related Articles
Pay Period Report
1. Log in to Everyminute using your Administrator credentials. 2. From the Dashboard, go to 'Reports' via the left-hand panel. 3. Select 'Pay Period' 4. By default, the current pay period is shown, but you can choose different dates using the ...Add/Edit Schedules
1. Log in to Everyminute using your Administrator credentials. 2. From the Dashboard, go to 'Schedules' via the left-hand panel. 3. Click '+ Add new schedule'. 4. Enter a title and description for your schedule. 5. Select the days of the week that ...View & Edit Timesheets
1. Log in to Everyminute using your Administrator credentials. 2. From the Dashboard, go to 'Timesheets' via the left-hand panel. 3. Choose the desired timeframe type to view (Pay Period, Weekly, Monthly or Custom) 4. Select the day and the employee ...Add/Edit Payrolls
1. Log in to Everyminute using your Administrator credentials. 2. From the Dashboard, go to 'Payrolls' via the left-hand panel. 3. Here you can click either 'Add Payroll' or Select an existing Payroll to view/edit. 4. You can modify the title and ...Add/Edit Team Members
The following steps will guide you on how to add team members to your roster. Please read each step carefully: 1. Log into Everyminute using your Administrator credentials. 2. From your Dashboard, navigate to 'Team Members' via the panel on the left ...